Make-Ahead No-Bake Dessert Cups Recipe
Highlighted under: Cakes, Cookies & More
Delight your guests with these easy and delicious Make-Ahead No-Bake Dessert Cups. Perfect for any occasion, they combine creamy layers of flavor without the need for baking.
This Make-Ahead No-Bake Dessert Cups Recipe is a perfect solution for those who want to impress without spending hours in the kitchen. The creamy layers of deliciousness can be prepared in advance, making it an ideal choice for parties or family gatherings.
Why You Will Love This Recipe
- Effortless preparation that saves you time
- Versatile flavors to satisfy any sweet tooth
- Ideal for entertaining or a cozy family dessert
Perfect for Any Occasion
These Make-Ahead No-Bake Dessert Cups are incredibly versatile, making them suitable for any gathering. Whether you're hosting a birthday party, holiday celebration, or a casual get-together with friends, these dessert cups will impress your guests. Their individual servings not only add to the presentation but also make it easy for everyone to enjoy without the hassle of cutting and serving a large cake.
The beauty of these dessert cups lies in their adaptability. You can customize the flavors and ingredients according to the season or your preferences. For instance, add pumpkin puree and spices for a fall twist or incorporate citrus zest for a refreshing summer treat. The possibilities are endless, ensuring you can cater to every palate.
An Easy Dessert to Make Ahead
One of the standout features of this recipe is its make-ahead convenience. By preparing these dessert cups in advance, you free up valuable time on the day of your event. Simply layer the ingredients, pop them in the fridge, and you’ll have a delightful dessert ready to serve when your guests arrive. This also allows the flavors to meld beautifully, enhancing the overall taste.
Additionally, the no-bake aspect means you can avoid turning on the oven, making it perfect for warm days or busy schedules. This recipe is a lifesaver for those who want to enjoy a decadent dessert without the stress of baking. The result is a creamy, flavorful treat that feels indulgent yet requires minimal effort.
A Crowd-Pleaser
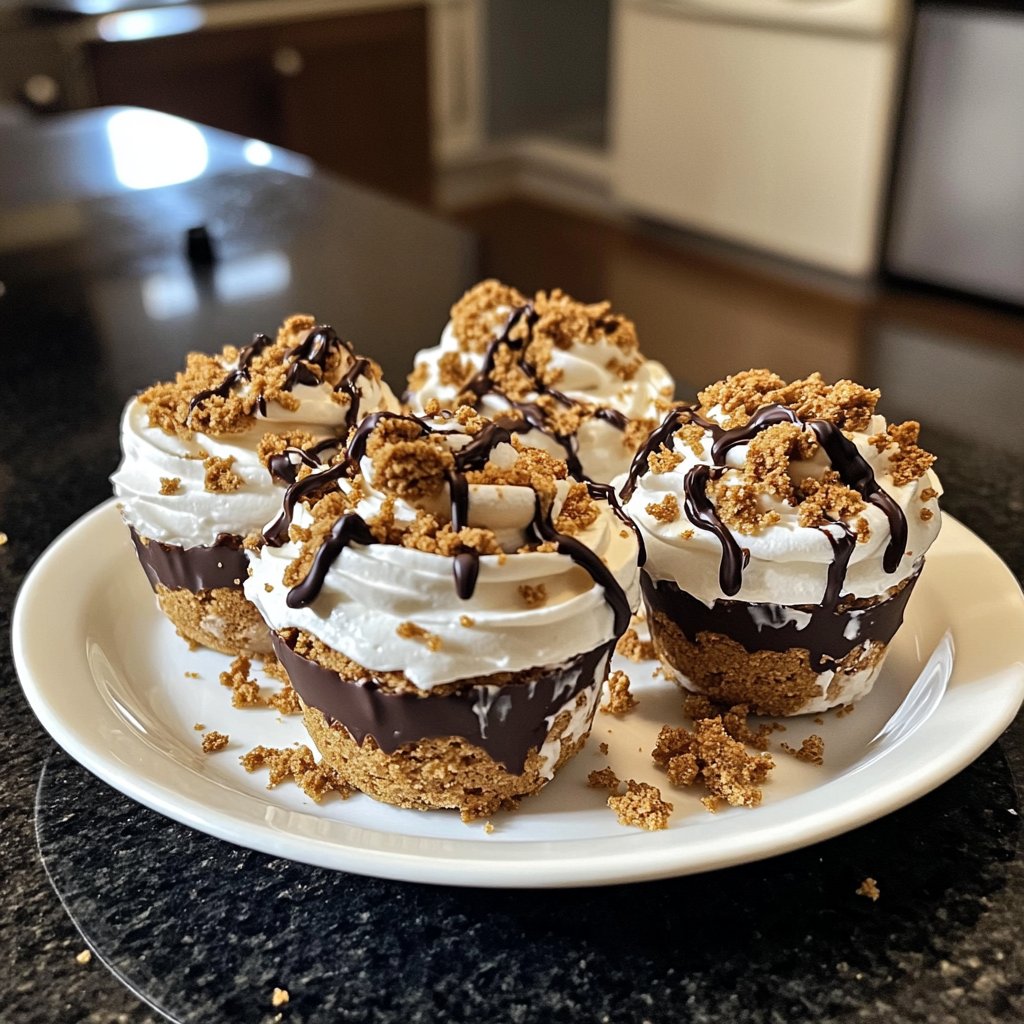
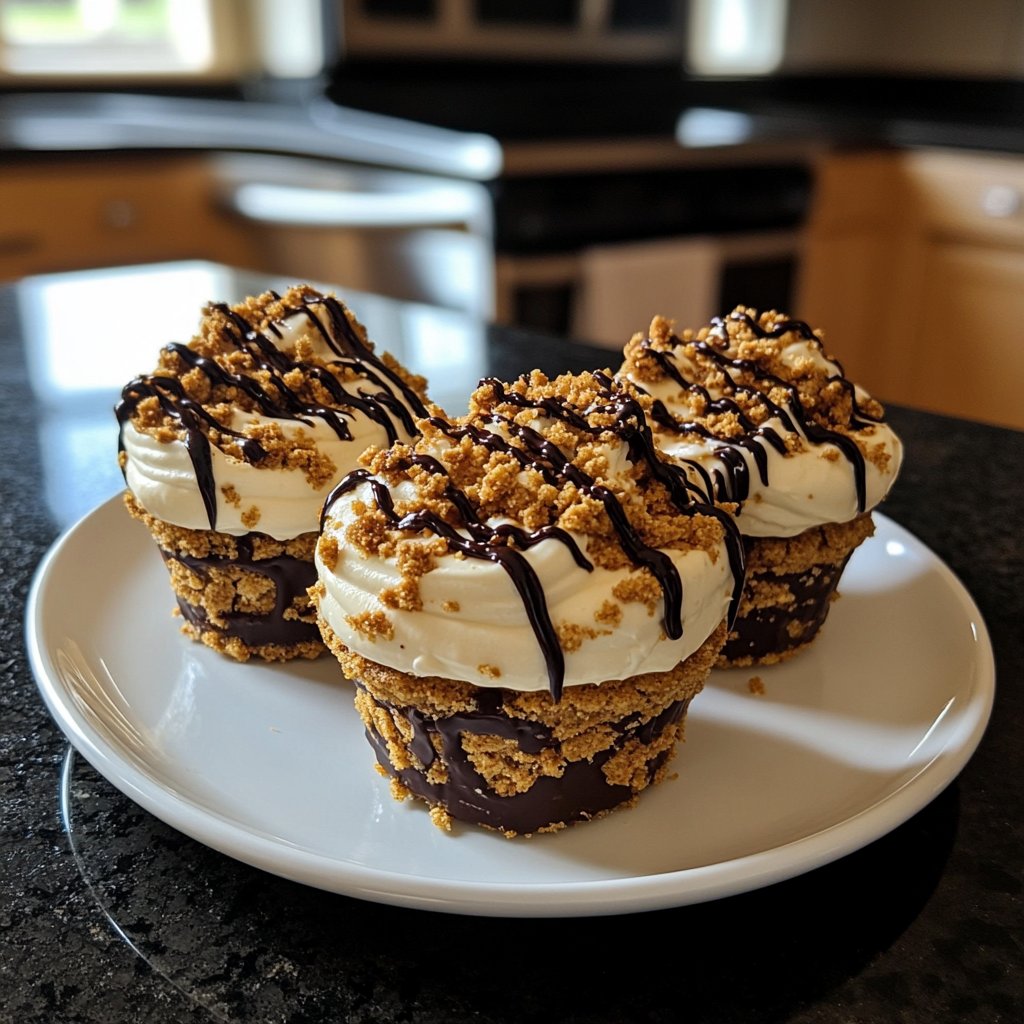
With their rich, creamy texture and delightful layers, these dessert cups are sure to be a hit with both kids and adults alike. The combination of whipped cream, cream cheese, and fresh fruit creates a harmonious balance of flavors that satisfies any sweet tooth. The crunchy cookie base adds a pleasing contrast, making each bite enjoyable.
Moreover, the visual appeal of these dessert cups cannot be overstated. The colorful layers of fruit and creamy mixture create an inviting presentation that can brighten up any table setting. Your guests will be drawn to these delightful cups, and they may even ask for seconds!
Ingredients
For the Dessert Cups
- 1 cup heavy cream
- 1/2 cup cream cheese, softened
- 1/2 cup powdered sugar
- 1 teaspoon vanilla extract
- 1 cup crushed cookies (e.g., graham crackers or Oreos)
- 1 cup fresh fruit (e.g., berries or sliced bananas)
- Chocolate shavings or sprinkles for garnish
Combine your favorite flavors and toppings for a personalized dessert experience!
Instructions
Prepare the Cream Mixture
In a mixing bowl, beat the heavy cream until soft peaks form. In another bowl, mix cream cheese, powdered sugar, and vanilla extract until smooth. Gently fold the whipped cream into the cream cheese mixture until well combined.
Layer the Ingredients
In serving cups, start with a layer of crushed cookies, followed by a layer of the cream mixture, and then a layer of fresh fruit. Repeat the layers until the cups are full, finishing with the cream mixture on top.
Chill and Serve
Cover the cups with plastic wrap and refrigerate for at least 2 hours or overnight. Before serving, garnish with chocolate shavings or sprinkles.
Enjoy your delicious no-bake dessert cups!
Pro Tips
- Feel free to customize the layers with flavored yogurts, different fruits, or even a drizzle of caramel or chocolate sauce.
Tips for Customization
Feel free to experiment with different types of cookies for the crust. While graham crackers and Oreos are classic choices, you could try vanilla wafers, chocolate chip cookies, or even gluten-free options. Each variation will bring a unique flavor and texture to your dessert cups.
For the fruit layer, consider using seasonal fruits to add freshness. Strawberries, peaches, and mangoes can add a burst of flavor, while nuts or granola can be added for an extra crunch. Don’t hesitate to mix and match according to your taste preferences.
Storage Recommendations
These dessert cups can be stored in the refrigerator for up to three days, making them a great option for meal prep or leftovers. Just be sure to cover them well with plastic wrap to prevent them from absorbing any odors from the fridge. If you're making them for a gathering, prepare them the day before for best results.
If you want to freeze them, consider leaving off the fresh fruit and toppings until you're ready to serve. The cream mixture freezes well, but fresh ingredients are best added just before enjoying to maintain their texture and flavor.
Serving Suggestions
When it comes to serving, consider pairing these dessert cups with a dollop of whipped cream or a scoop of ice cream for an extra indulgence. A drizzle of chocolate or caramel sauce can also elevate the dessert's flavor profile, making it even more appealing.
For a fun twist, serve these dessert cups alongside a selection of toppings, allowing guests to personalize their treats. Options like chopped nuts, shredded coconut, or flavored syrups can turn this already delightful dessert into a creative experience.
Questions About Recipes
→ Can I make these dessert cups a day in advance?
Yes! These dessert cups are perfect for making ahead of time. Just store them in the refrigerator.
→ What types of cookies can I use?
You can use any type of cookies, such as graham crackers, Oreos, or even vanilla wafers.
→ How long can I store these dessert cups?
They can be stored in the refrigerator for up to 3 days.
→ Can I use non-dairy alternatives?
Absolutely! You can substitute heavy cream and cream cheese with non-dairy options like coconut cream and vegan cream cheese.
Make-Ahead No-Bake Dessert Cups Recipe
Created by: Lucy Bennett
Recipe Type: Cakes, Cookies & More
Skill Level: Beginner
Final Quantity: 4 cups
What You'll Need
For the Dessert Cups
- 1 cup heavy cream
- 1/2 cup cream cheese, softened
- 1/2 cup powdered sugar
- 1 teaspoon vanilla extract
- 1 cup crushed cookies (e.g., graham crackers or Oreos)
- 1 cup fresh fruit (e.g., berries or sliced bananas)
- Chocolate shavings or sprinkles for garnish
How-To Steps
In a mixing bowl, beat the heavy cream until soft peaks form. In another bowl, mix cream cheese, powdered sugar, and vanilla extract until smooth. Gently fold the whipped cream into the cream cheese mixture until well combined.
In serving cups, start with a layer of crushed cookies, followed by a layer of the cream mixture, and then a layer of fresh fruit. Repeat the layers until the cups are full, finishing with the cream mixture on top.
Cover the cups with plastic wrap and refrigerate for at least 2 hours or overnight. Before serving, garnish with chocolate shavings or sprinkles.
Extra Tips
- Feel free to customize the layers with flavored yogurts, different fruits, or even a drizzle of caramel or chocolate sauce.
Nutritional Breakdown (Per Serving)
- Calories: 250 kcal
- Total Fat: 18g
- Saturated Fat: 10g
- Cholesterol: 60mg
- Sodium: 95mg
- Total Carbohydrates: 22g
- Dietary Fiber: 1g
- Sugars: 15g
- Protein: 3g